Creating PLC project (online project)
This section describes how to create a new PLC project. In the example, AIPEX PRO is connected to a demo model. The device properties are transferred directly from the demo model.
Start AIPEX PRO.
|
|
Prerequisite:
Icon: Status 'Red' or no icon present, check the following points: Initial start-up of field bus completed: Is direct connection via Ethernet active?: |

 'Communication/Icon': Status 'Green' (Interface wide)
|
|
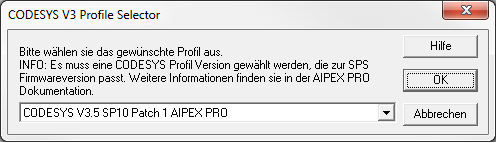
Before creating the AIPEX PRO project, the CODESYS version must be set. CODESYS Version change: Siehe 'Version change'. |
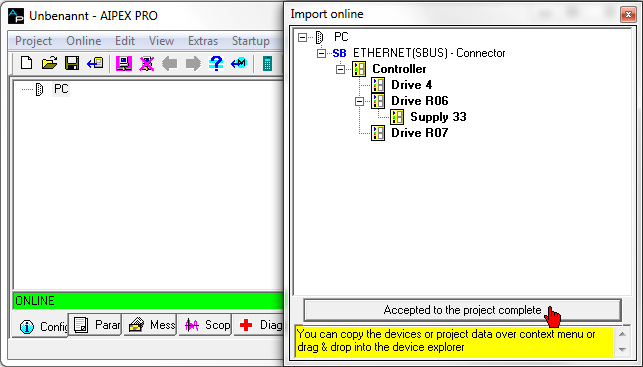
Press 'Logon' to create a connection with the connected devices.

In the 'Import online' window, check whether all physical devices have been detected.
Press 'Accepted to the project complete' to import the device data.
|
|
Check the wiring and the system statuses if devices are not shown. |
You can customize the device names ('Station names') to your application. The device names are added to the PLC project automatically as symbolic device names (PLC variables).

Assign a 'fixed address' to each EtherCAT subscriber by setting a checkmark in the checkbox.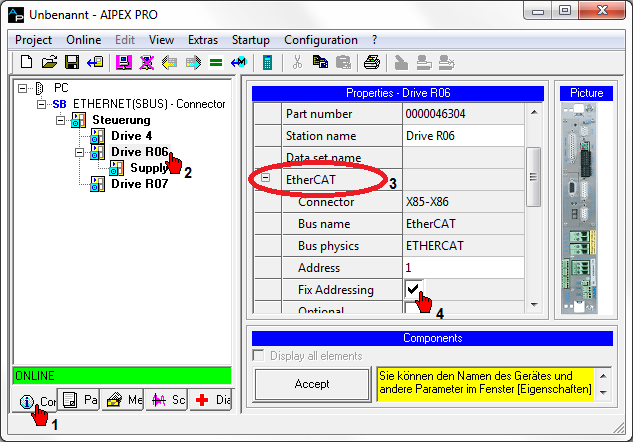
|
|
Restart the computer to activate the change. |
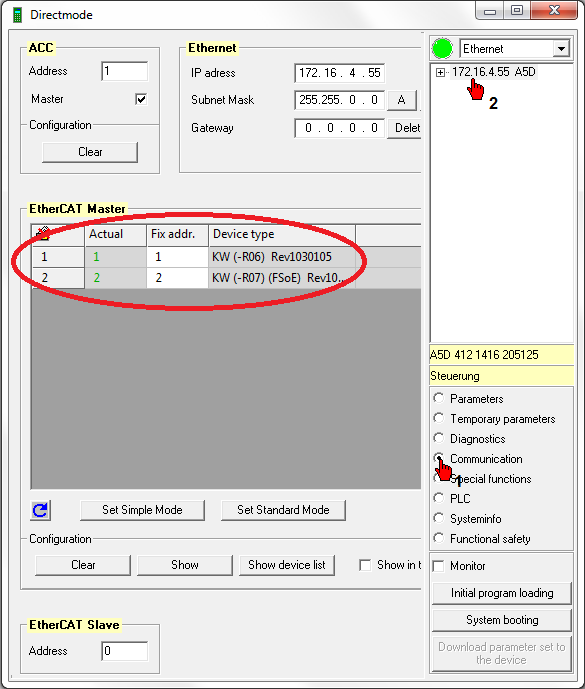
Once the system reboot is fully completed, you can check the addressing in the 'Direct mode' → 'Communication' menu.
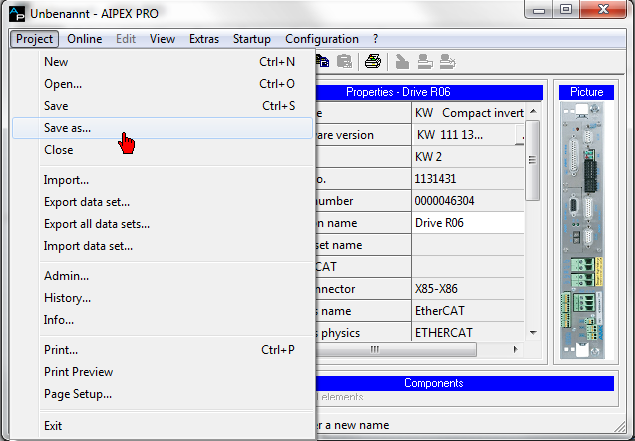
Save the imported project under 'Save as ...'. You can assign a different name to the PLC project later.
|
|
The CODESYS version set on the controller determines which CODESYS version is opened. CODESYS Version change: Siehe 'Version change'.
If you only change the CODESYS version now, you will have to create the AIPEX PRO project anew. Procedure Menu 'Project'→ 'New'. See beginning of section. |
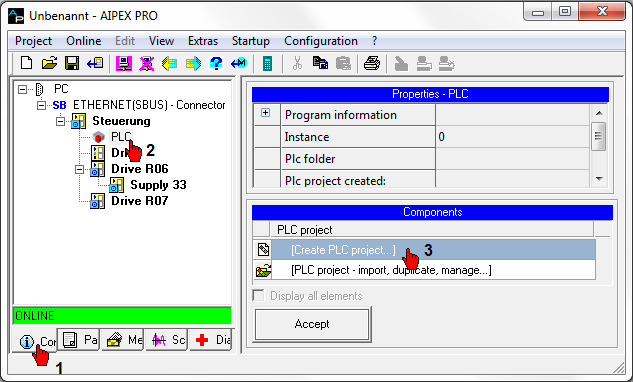
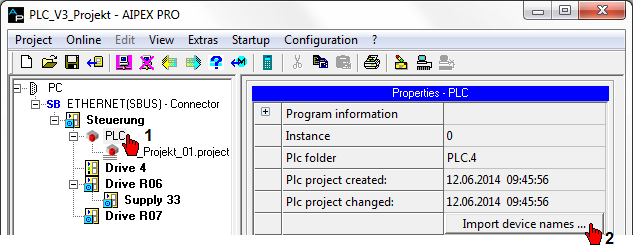
Select the 'PLC' icon in the device tree.
You can then open the PLC CODESYS programming system by selecting 'Create new PLC project...'.
|
|
Icon 'PLC' missing: Right-click in the device tree. You can customize the view under 'Select view'. |
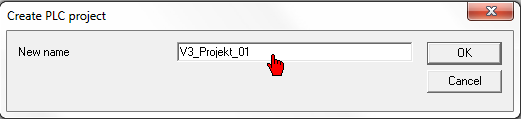
Assign a different name to the PLC project
CODESYS V3 starts

The physically existing device names (from the AIPEX PRO device tree) are imported into the PLC project automatically as 'PLC device handle name' (described in the documentation as symbolic device names). The extension 'g_st' stands for a global structure variable.
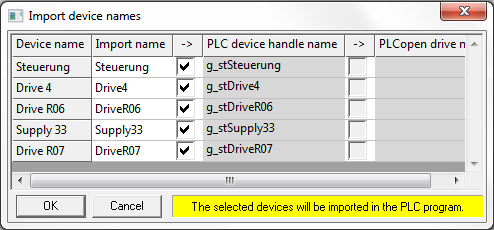
This function is activated and deactivated in the menu 'Extras' → 'Options' → 'Configuration create' → 'Import device names when creating a PLC project'.
Additional information:
The device names can be imported manually by pressing the 'Import device names' button.
|
|
Switching between the AIPEX and CODESYS interface
Click on any AIPEX icon to switch to the AIPEX interface. Click on the CODESYS PLC project name to switch to the CODESYS interface. |
You will find the symbolic device names at 'Devices' -> 'G_DEVICE (G_DEVICE)' .
In the device tree from AIPEX PRO is the PLC device handle name linked with the attendant device icon 'Interface' automatically.
The automatic message configuration use this information to create a message configuration file.

Additional information:
The symbolic device names can also be created manually. In this case, the link between devices interface and symbolic device names must be assigned manually. This takes place after you have called the AIPEX menu 'Configuration' → 'Configuration create'. Siehe 'Automatic bus configuration'.
